# Latte Art Basics

# How to Make Perfect Latte Art with Steamed Milk
# Milk Science and Steaming
There is a bit of science to steaming milk, as with the rest of espresso making. The 3 main things we look for in cold milk for coffee preparation are:
Fat
The good stuff really effects the texture of the beverage and latte art
Sugar
Lactose, made up of galactose and glucose
Protein
A long chain of amino acids which when in cold milk are all wound up. The hydrophobic molecules of the protein are buried inside the coil because they do not like water. The proteins are what create microfoam.
When milk gets heated these 3 components change:
Fat Gets thinner and melts
Sugar Breaks down into smaller, simpler sugars which have a sweeter taste, we perceive milk to be at its sweetest around 60 - 65 degrees celsius
Protein The coil loosens up and the hydrophobic molecules (enzymes) become exposed and look for somewhere to go. The hydrophobic molecules will attach themselves to the closest substance to them, which would be the bubbles formed by air. They encapsulate the air bubbles with a skeleton of protein, thus holding its structure and thats what we call microfoam. However, the hydrophobic molecules become denatured and don’t do anything when the temperature exceeds 37 degrees celsius, the temperature we feel ‘warm’ at.
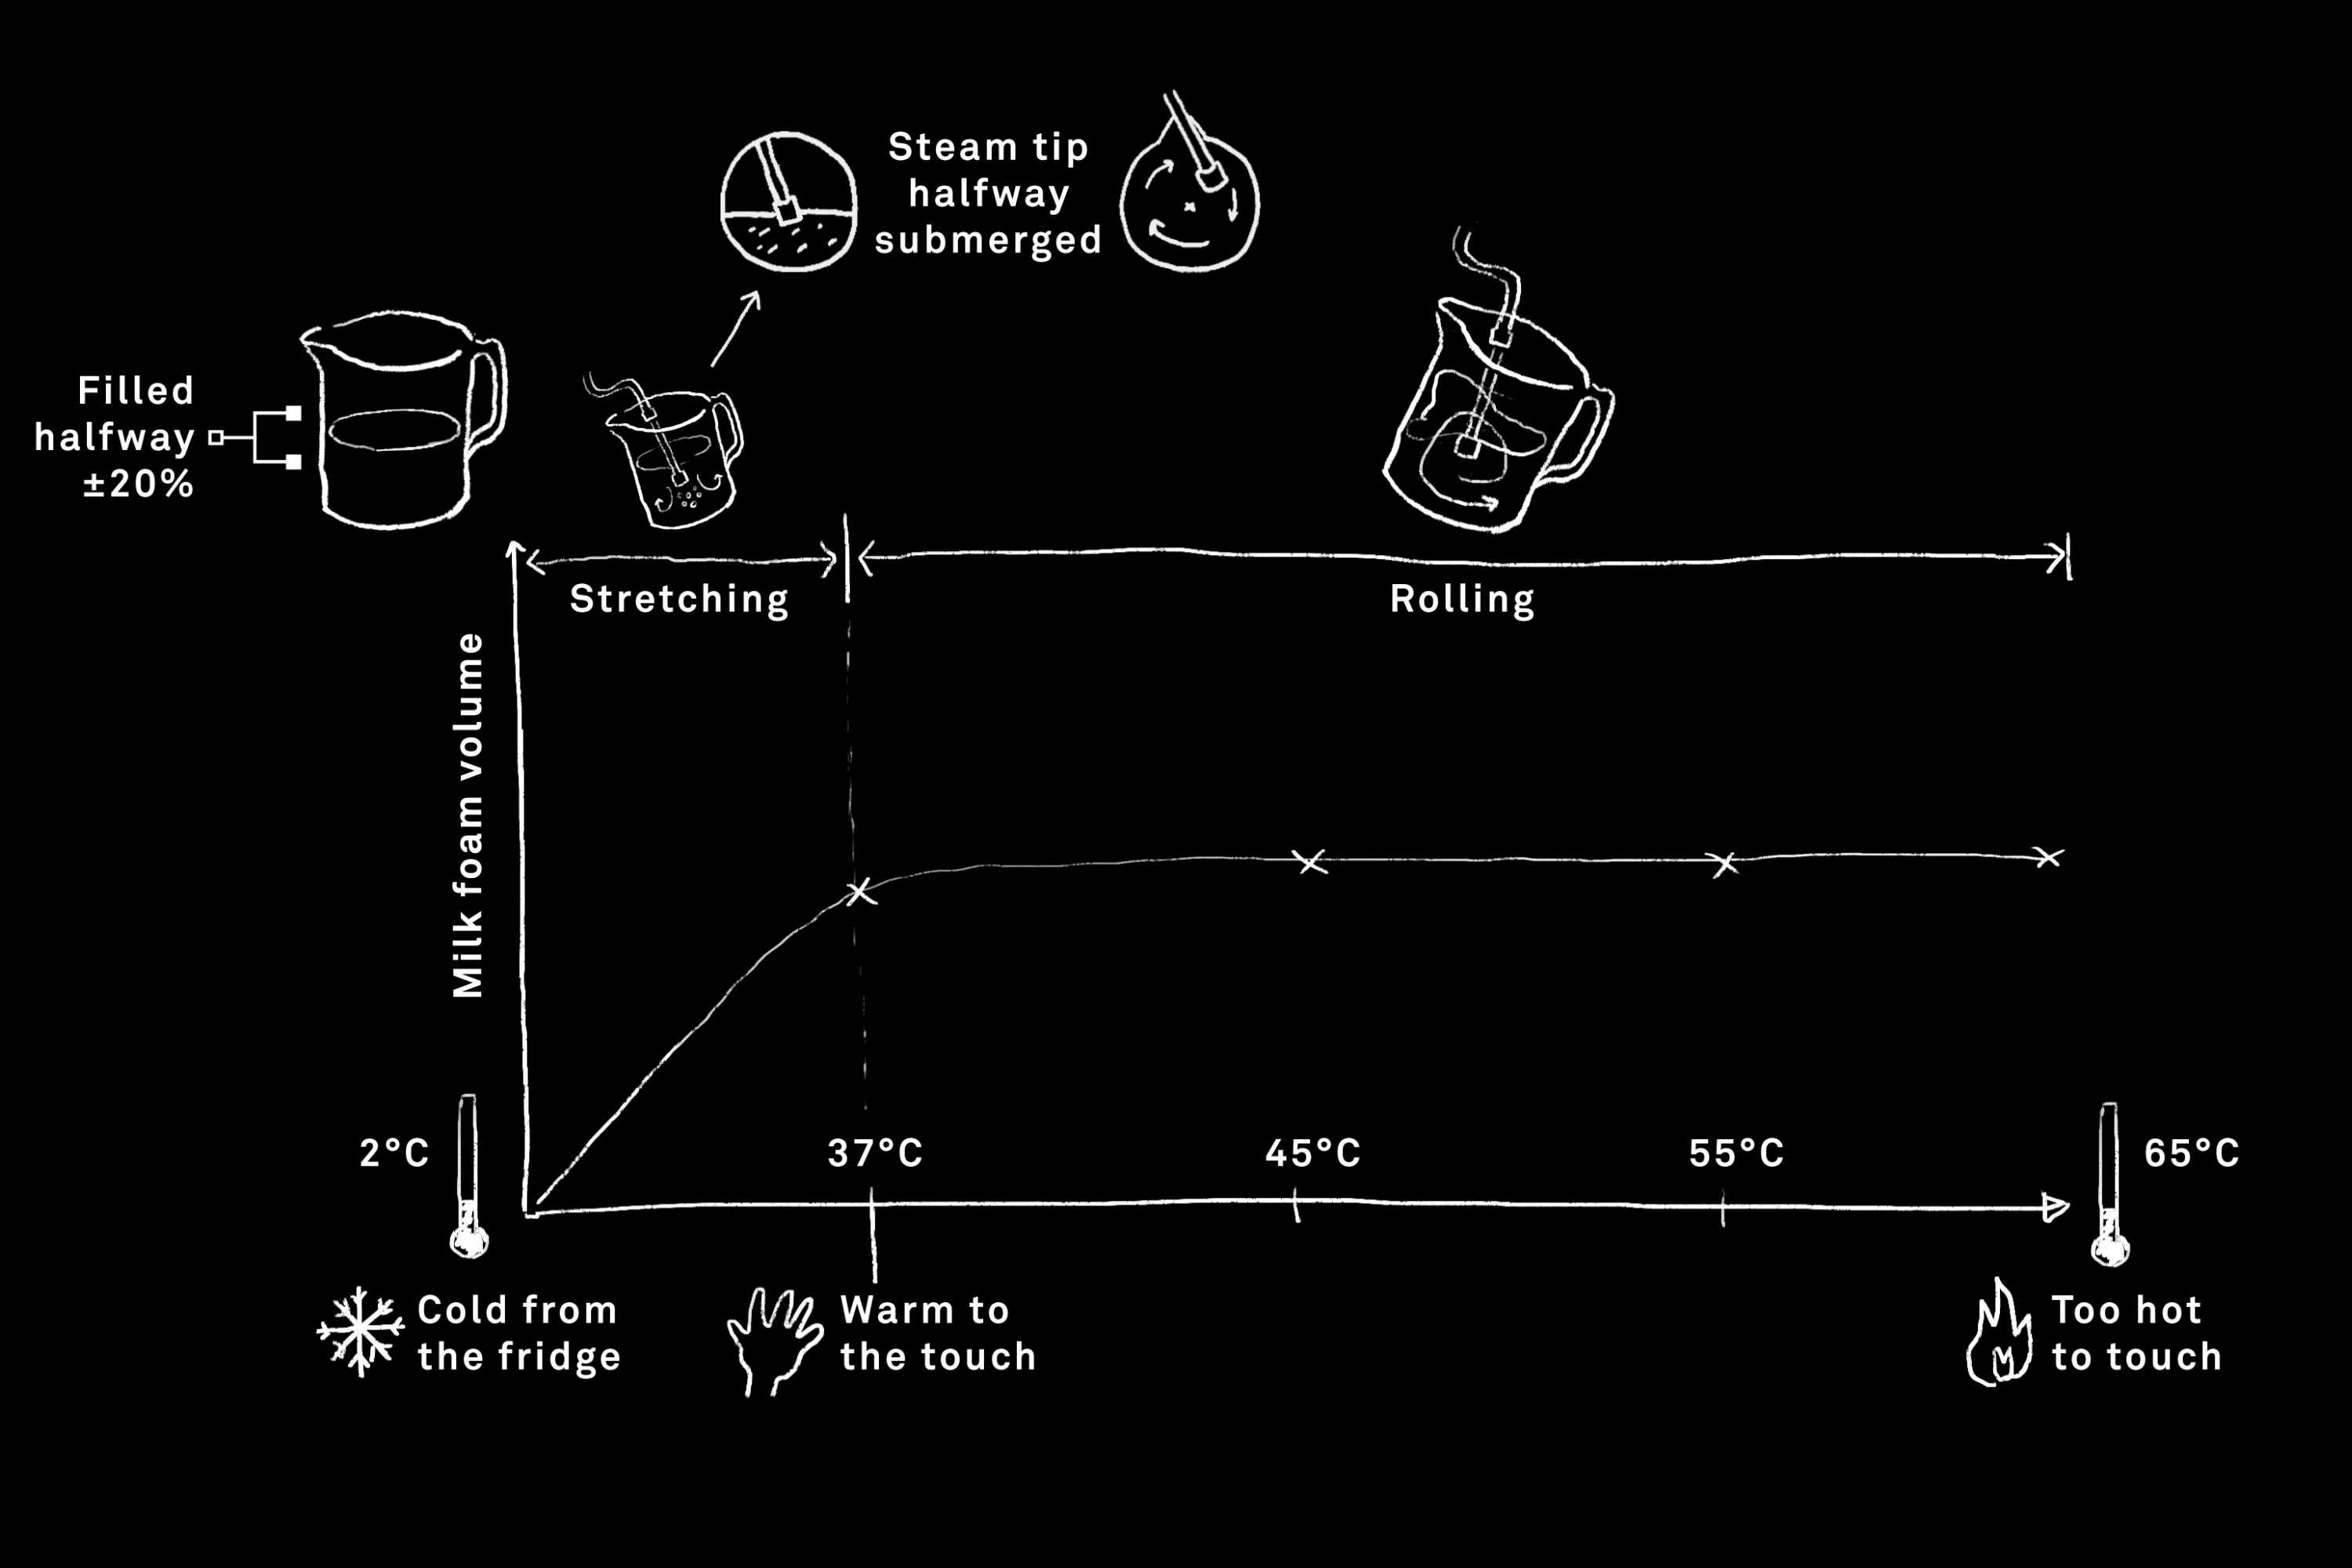
Start with milk below 7 degrees celsius and introduce air (stretch) until 37 degrees celsius. This step will ensure that the air introduced into the milk will turn in microfoam. Once the milk has reached 37 degrees celsius, it is important not to stretch the milk anymore but still maintain a whirlpool and increasing the milk temperature to 60 – 65 degrees celsius, usually this temperature can be detected when the jug is too hot to hold for more than 3 seconds to the touch.
Heating the milk over 70 degrees celsius will create souring and will scald the milk.
Always start with a milk pitcher around half full of ‘cold milk’, give or take about 20% from the midway point.
Start with the steam tip halfway submerged into the milk, the steam tip needs to be in-between the centre and the side of the jug, either clockwise (in diagram) or anti-clockwise.
Milk needs to be spinning in a circular motion.
Tip: lock the steam arm into the spout to minimize the amount of movement of the pitcher while steaming.
# Milk Jugs
Finding the perfect milk jug depends on several factors, such as the user’s preference on pouring with a smaller or larger jug or what art are you trying to achieve, as the different shaped spouts will give you a different result. Here’s a quick guide to the different spouts and what art they are better suited for:
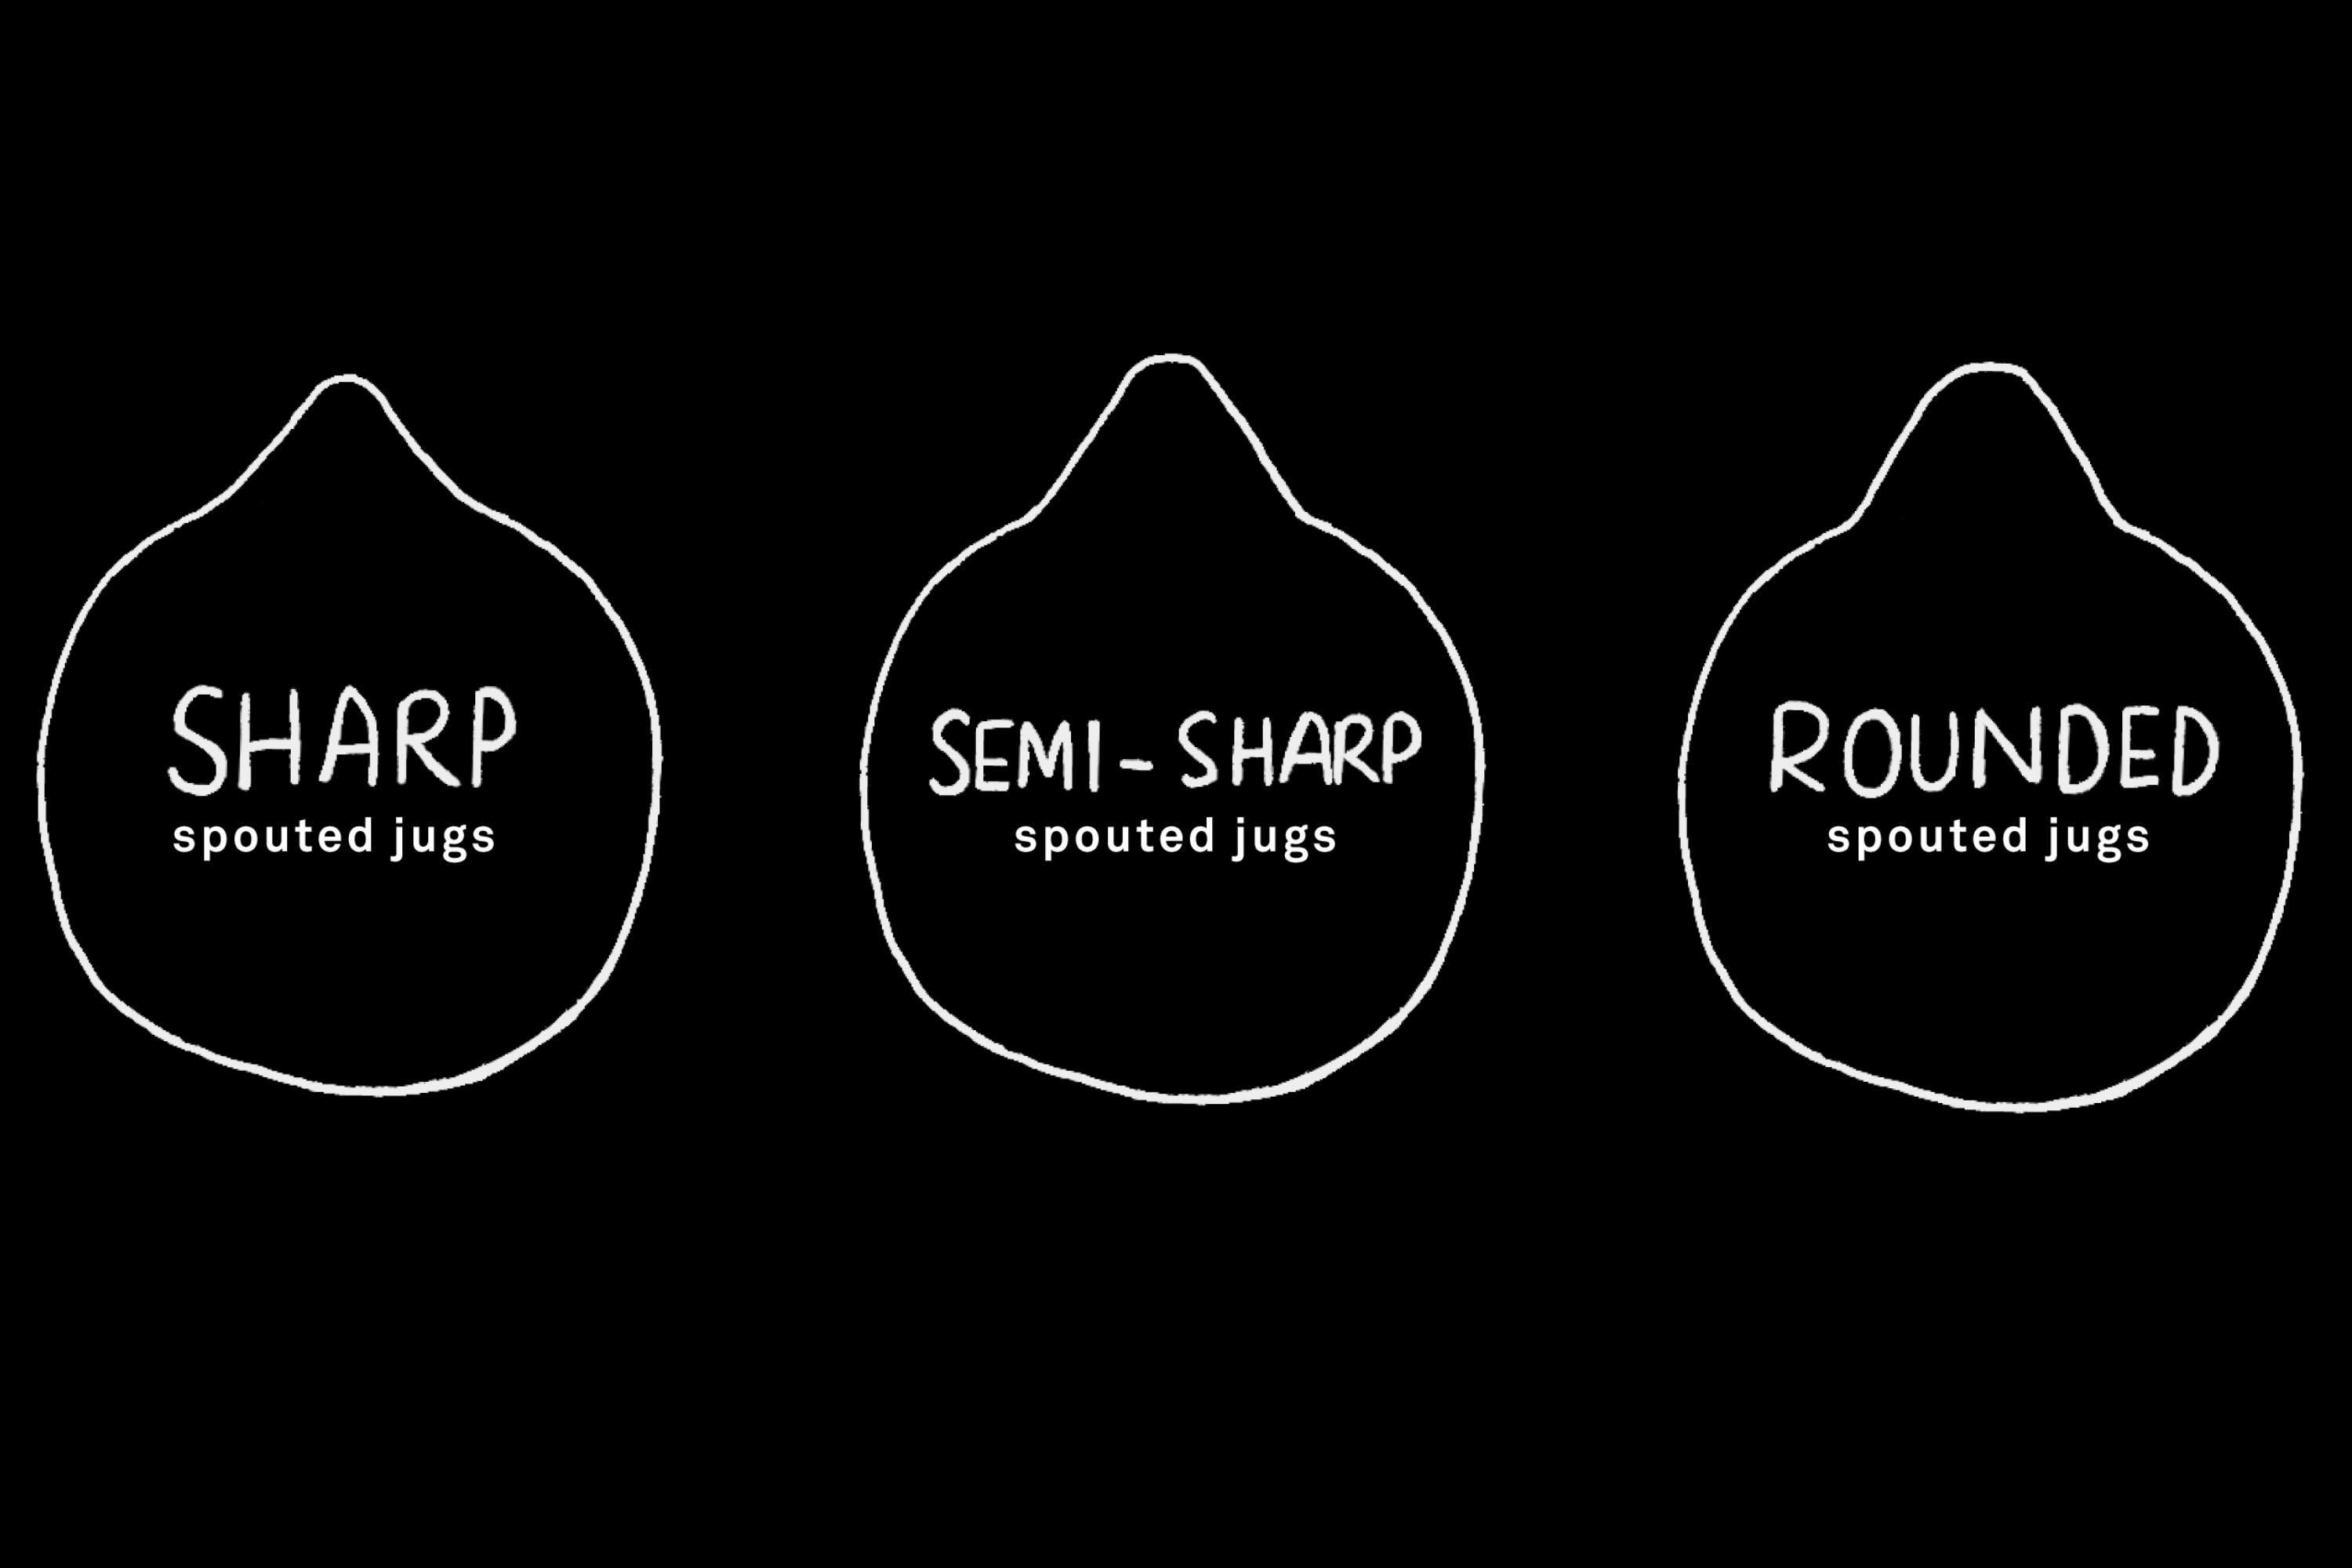
Sharp Spouted Jugs are great for finer detailed latte art such as pours that incorporate wiggles, such as rosettas. They are good for complex patterns that require a lot of elements.
Semi–Sharp Spouted Jugs are great for most patterns and will give you the best of both worlds, fine lines and clean round shapes, good for all the basic pours and med to high complex patterns.
Round Spouted Jugs are great for simple and clean latte art, especially tulips, hearts and dots. They promote consistency and efficiency.
# Pouring
Before we pour any milk into the coffee the position of the jugs spout facing the cup is important, this will determine where the latte art will be facing once poured (ideally, we want it to face the customer).
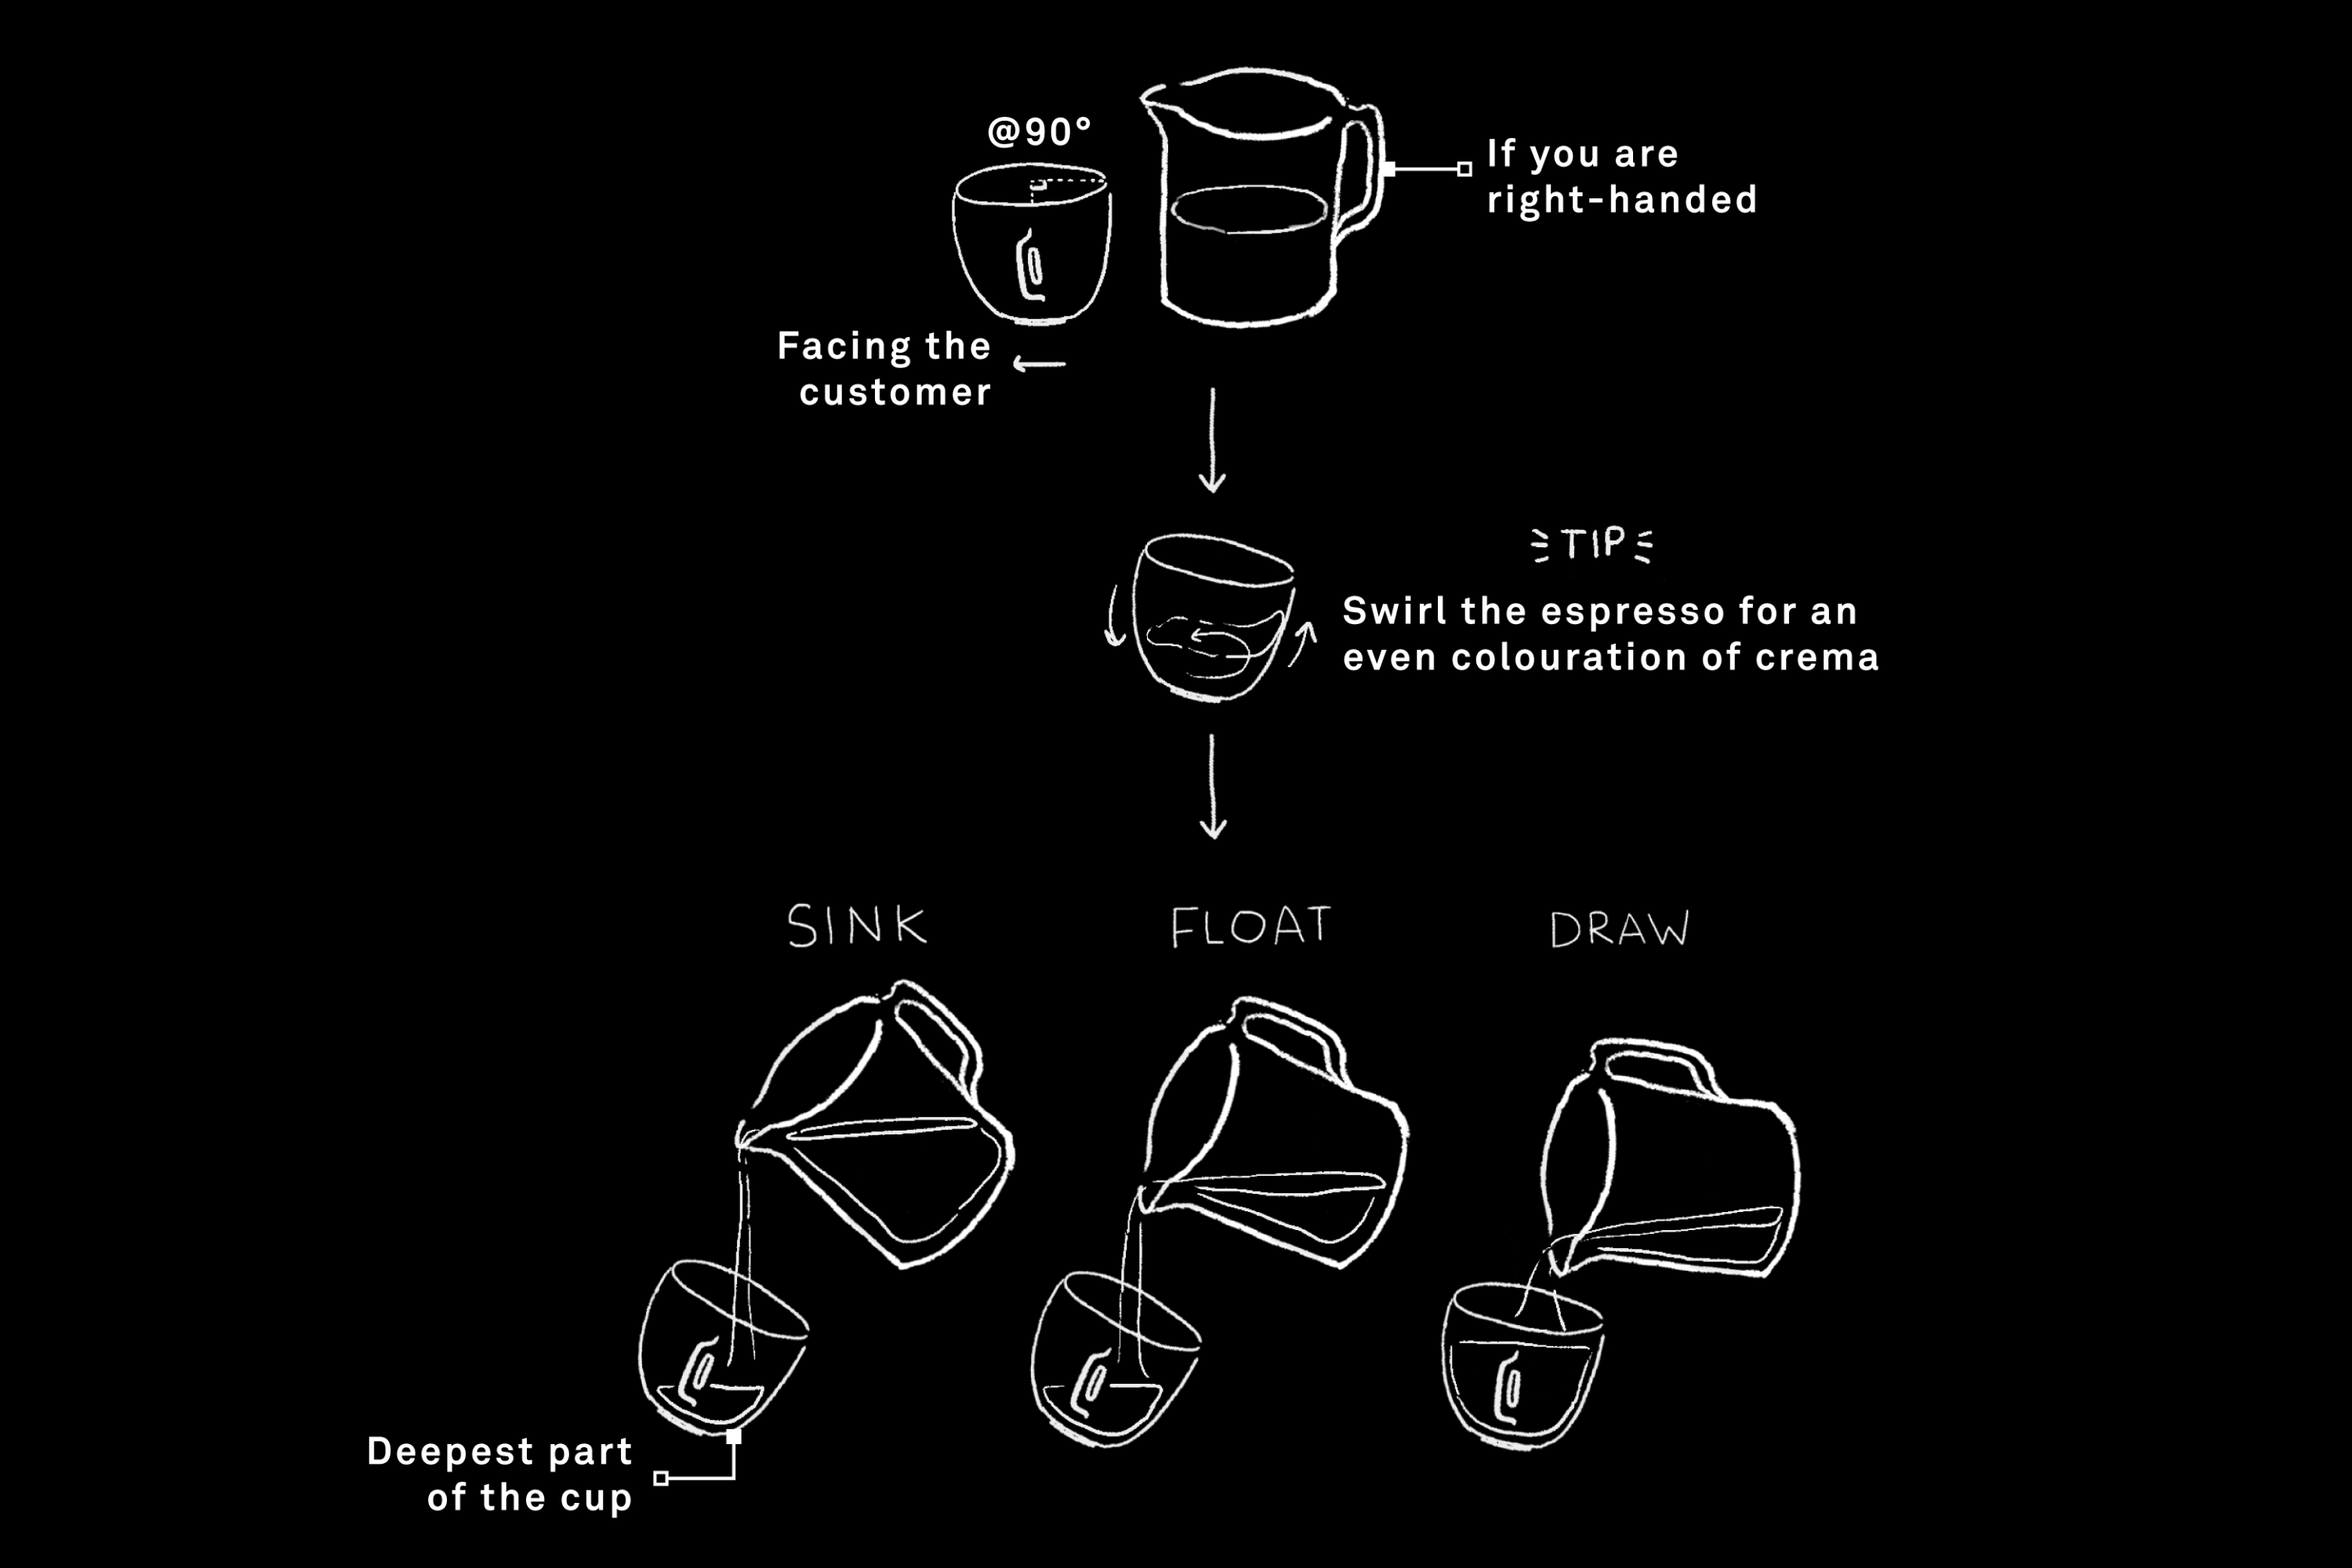
You must pour into the deepest part of the cup to begin any latte art pours as this part is crucial to raise your crema so that you will have a nice canvas of crema to draw onto.
Tip: Swirl your espresso before you pour so that you create an even colouration of crema
The deepest part of the cup is usually where the ridge is.
Tilting your jug forward will control the amount of flow of your milk. The harder you tilt forward, the more the white it will pour on the surface of your coffee.
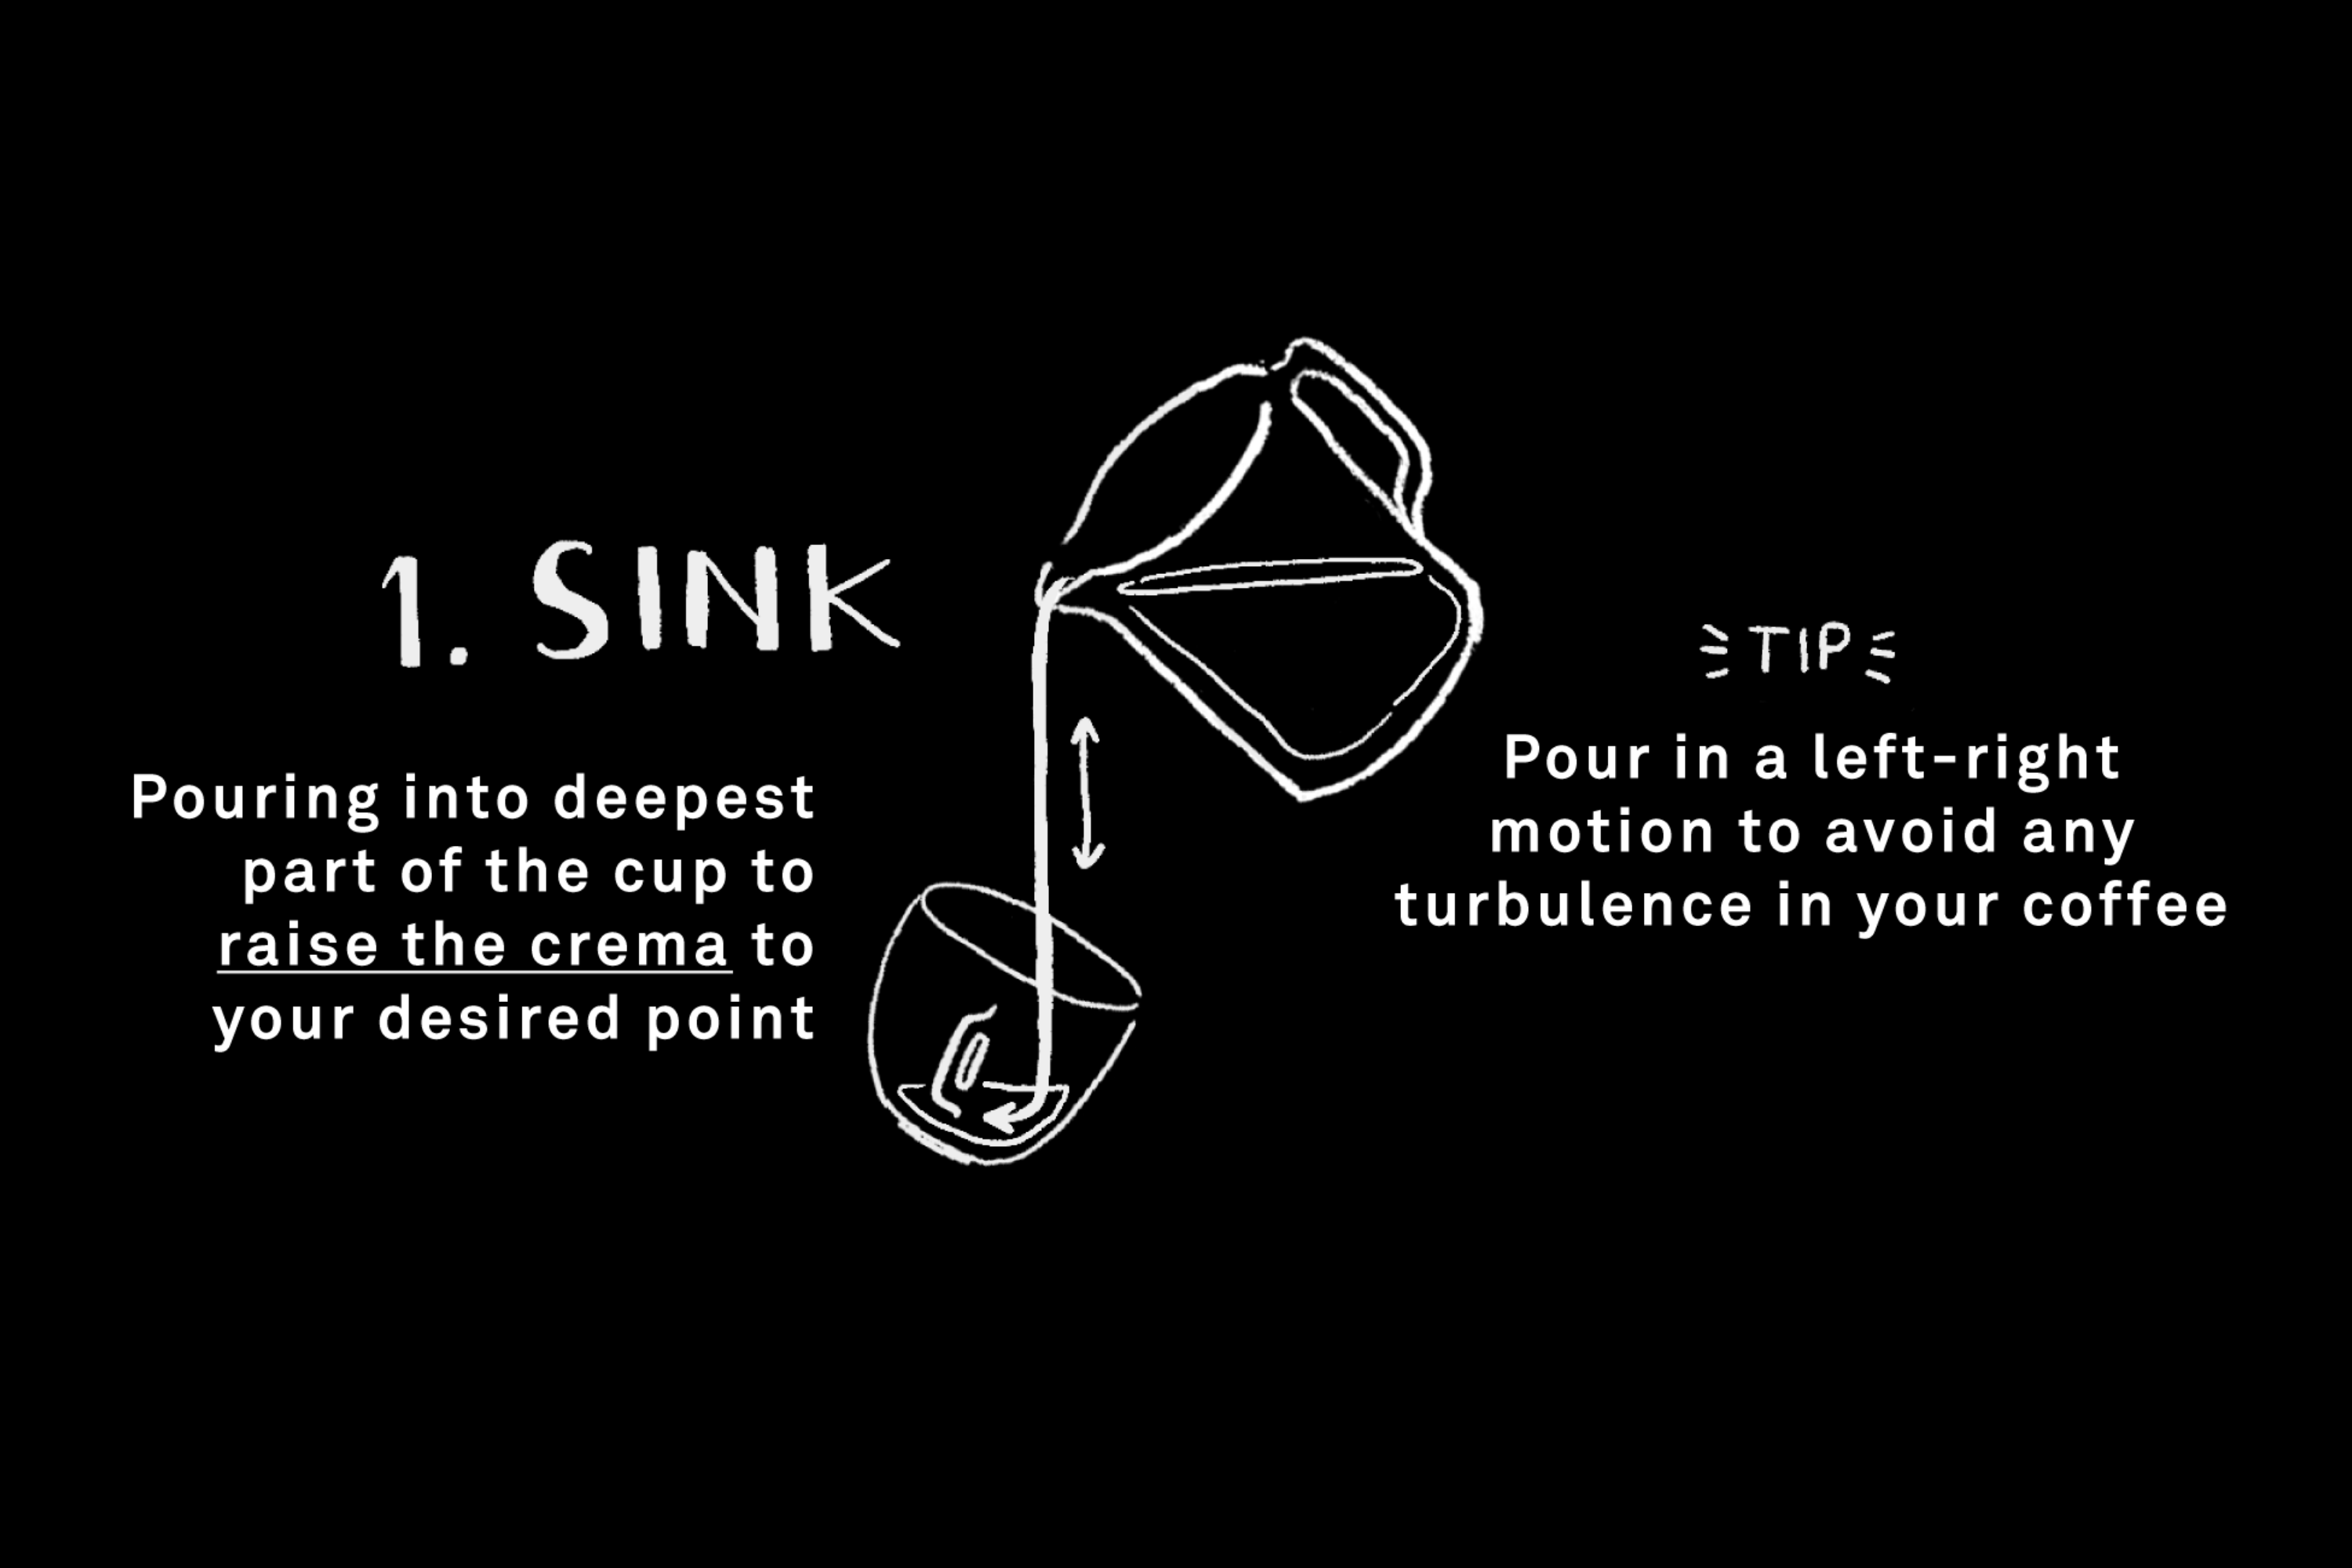
Sinking the milk is all about pouring the milk into the deepest part of the cup so you can raise your crema to your desired point. Where you want to raise it to depends on the complexity of your pattern, the simpler the art the more you raise, the harder the art the less you raise.
Tip: Pour in a left right motion rather than a circular motion to avoid turbulence in your coffee, so when it’s time to draw, the movement of the milk won’t warp your art. Keep pouring higher as you’re sinking the milk, as the cup fills up, your stream of milk is getting shorter.
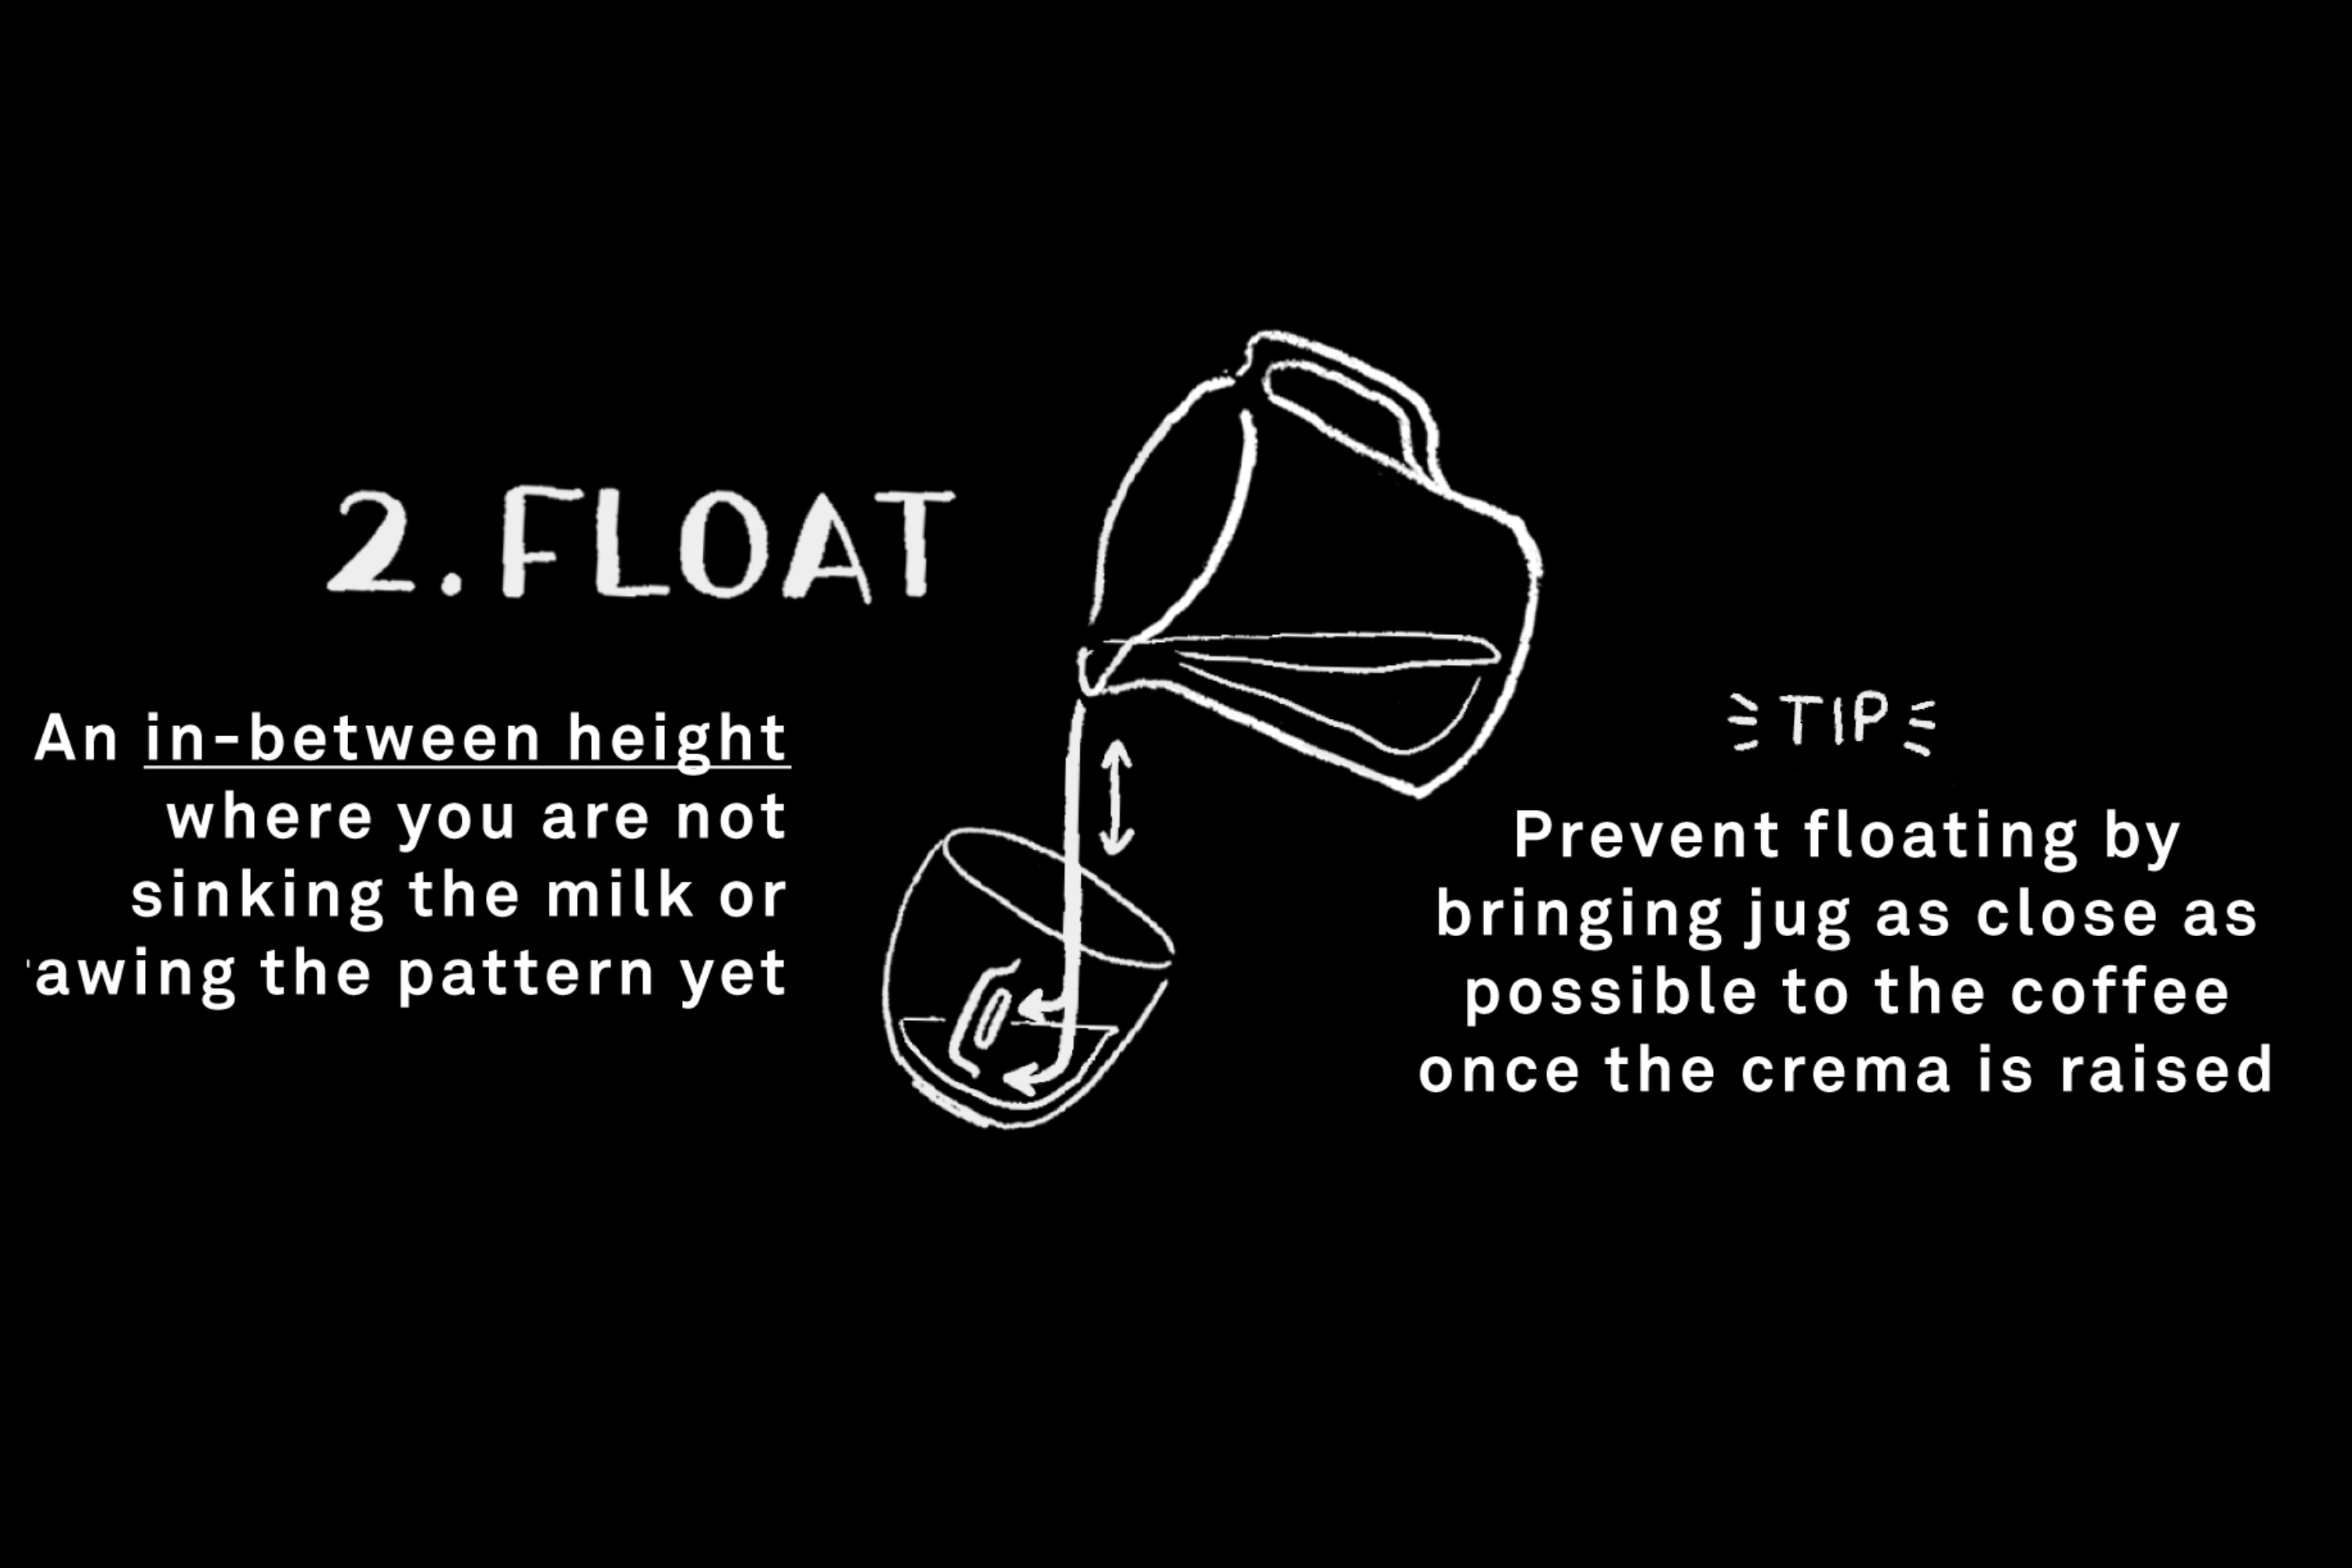
Floating the milk is the one of the three stages of pouring that we do not want in producing latte art.
This is the in-between height where it’s not poured high enough that we are sinking the milk, but not close enough that we are drawing the pattern. In this case we get washed out colours that are murky and faded.
Tip: to prevent floating, once the crema is raised stop pouring for a split second and bring the jug as close as possible to the coffee to start the drawing stage.
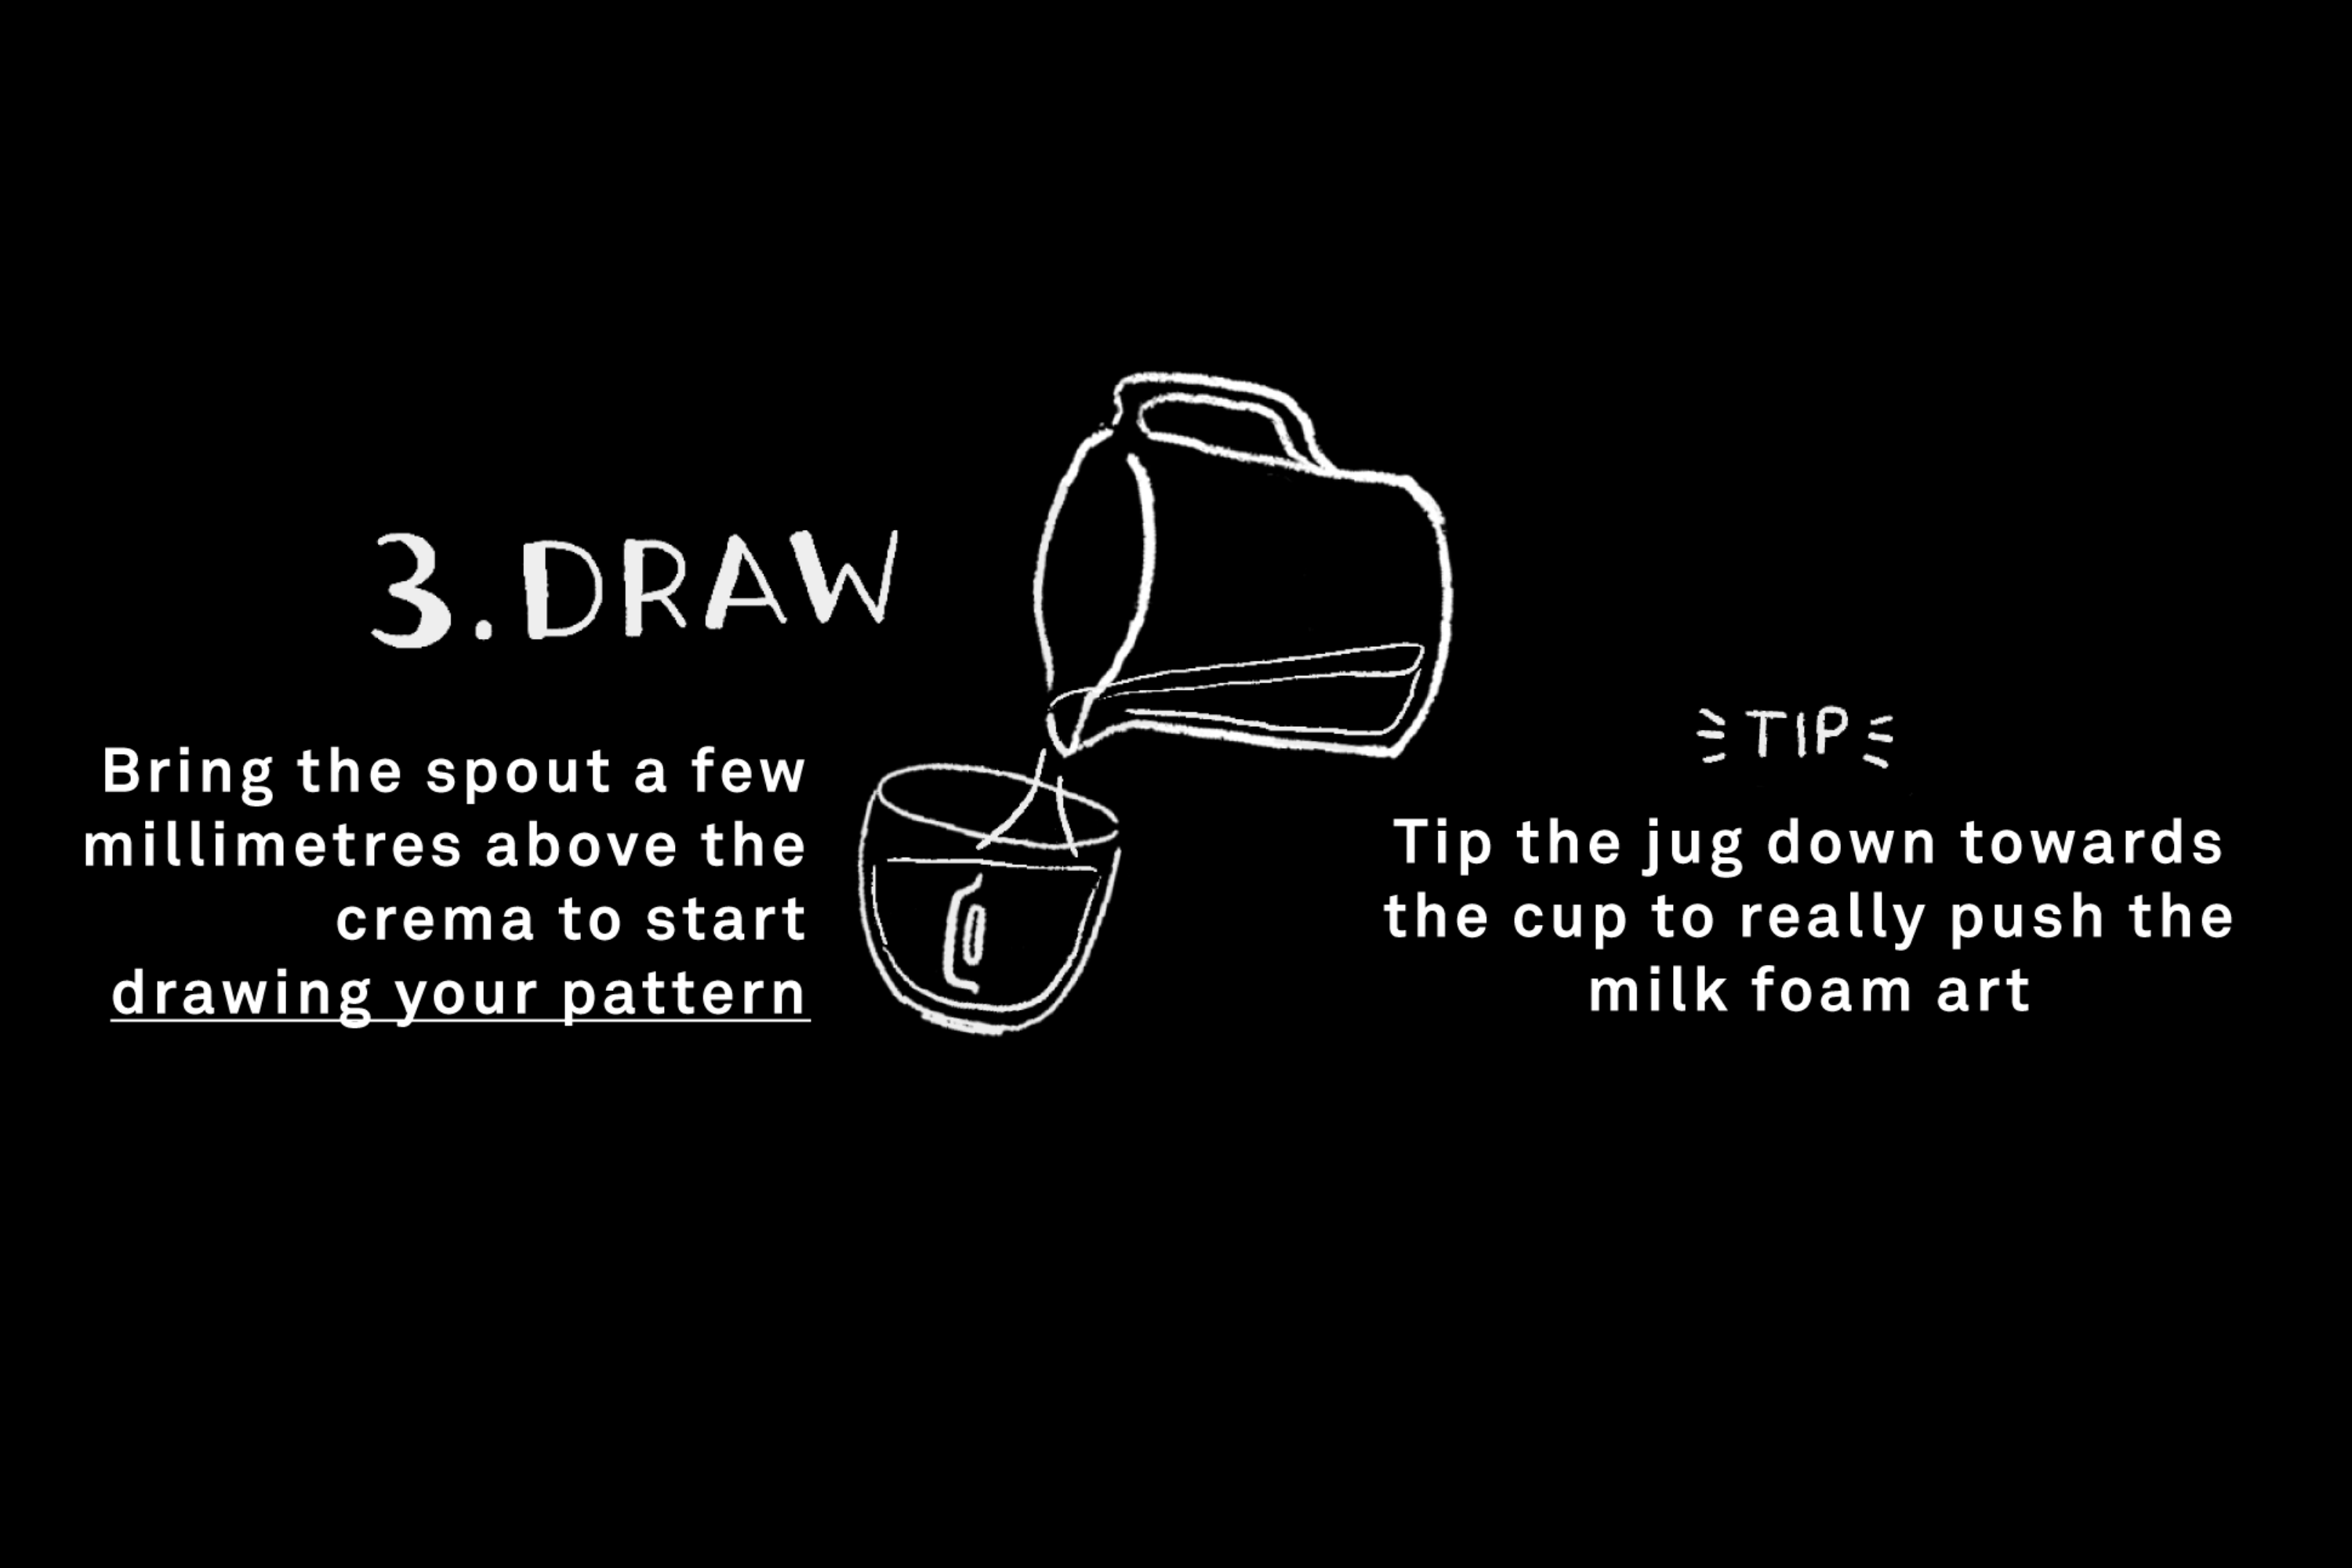
Drawing is the stage where the jugs spout needs to be as close as possible to the coffee but not actually touching the crema. Generally a few millimetres above the crema.
Depending on the pattern, the point where you start to draw will be different but in most cases, it’s near the lip area closest to the milk jug.
# Latte Art Designs and Tips For Beginners!
How to pour the Latte Art Basics: Heart, Rosetta and Tulip. Start pouring these basic patterns first and only proceed to more advanced ones, after you really learned how to pour and control the basics.
# Basic Patterns
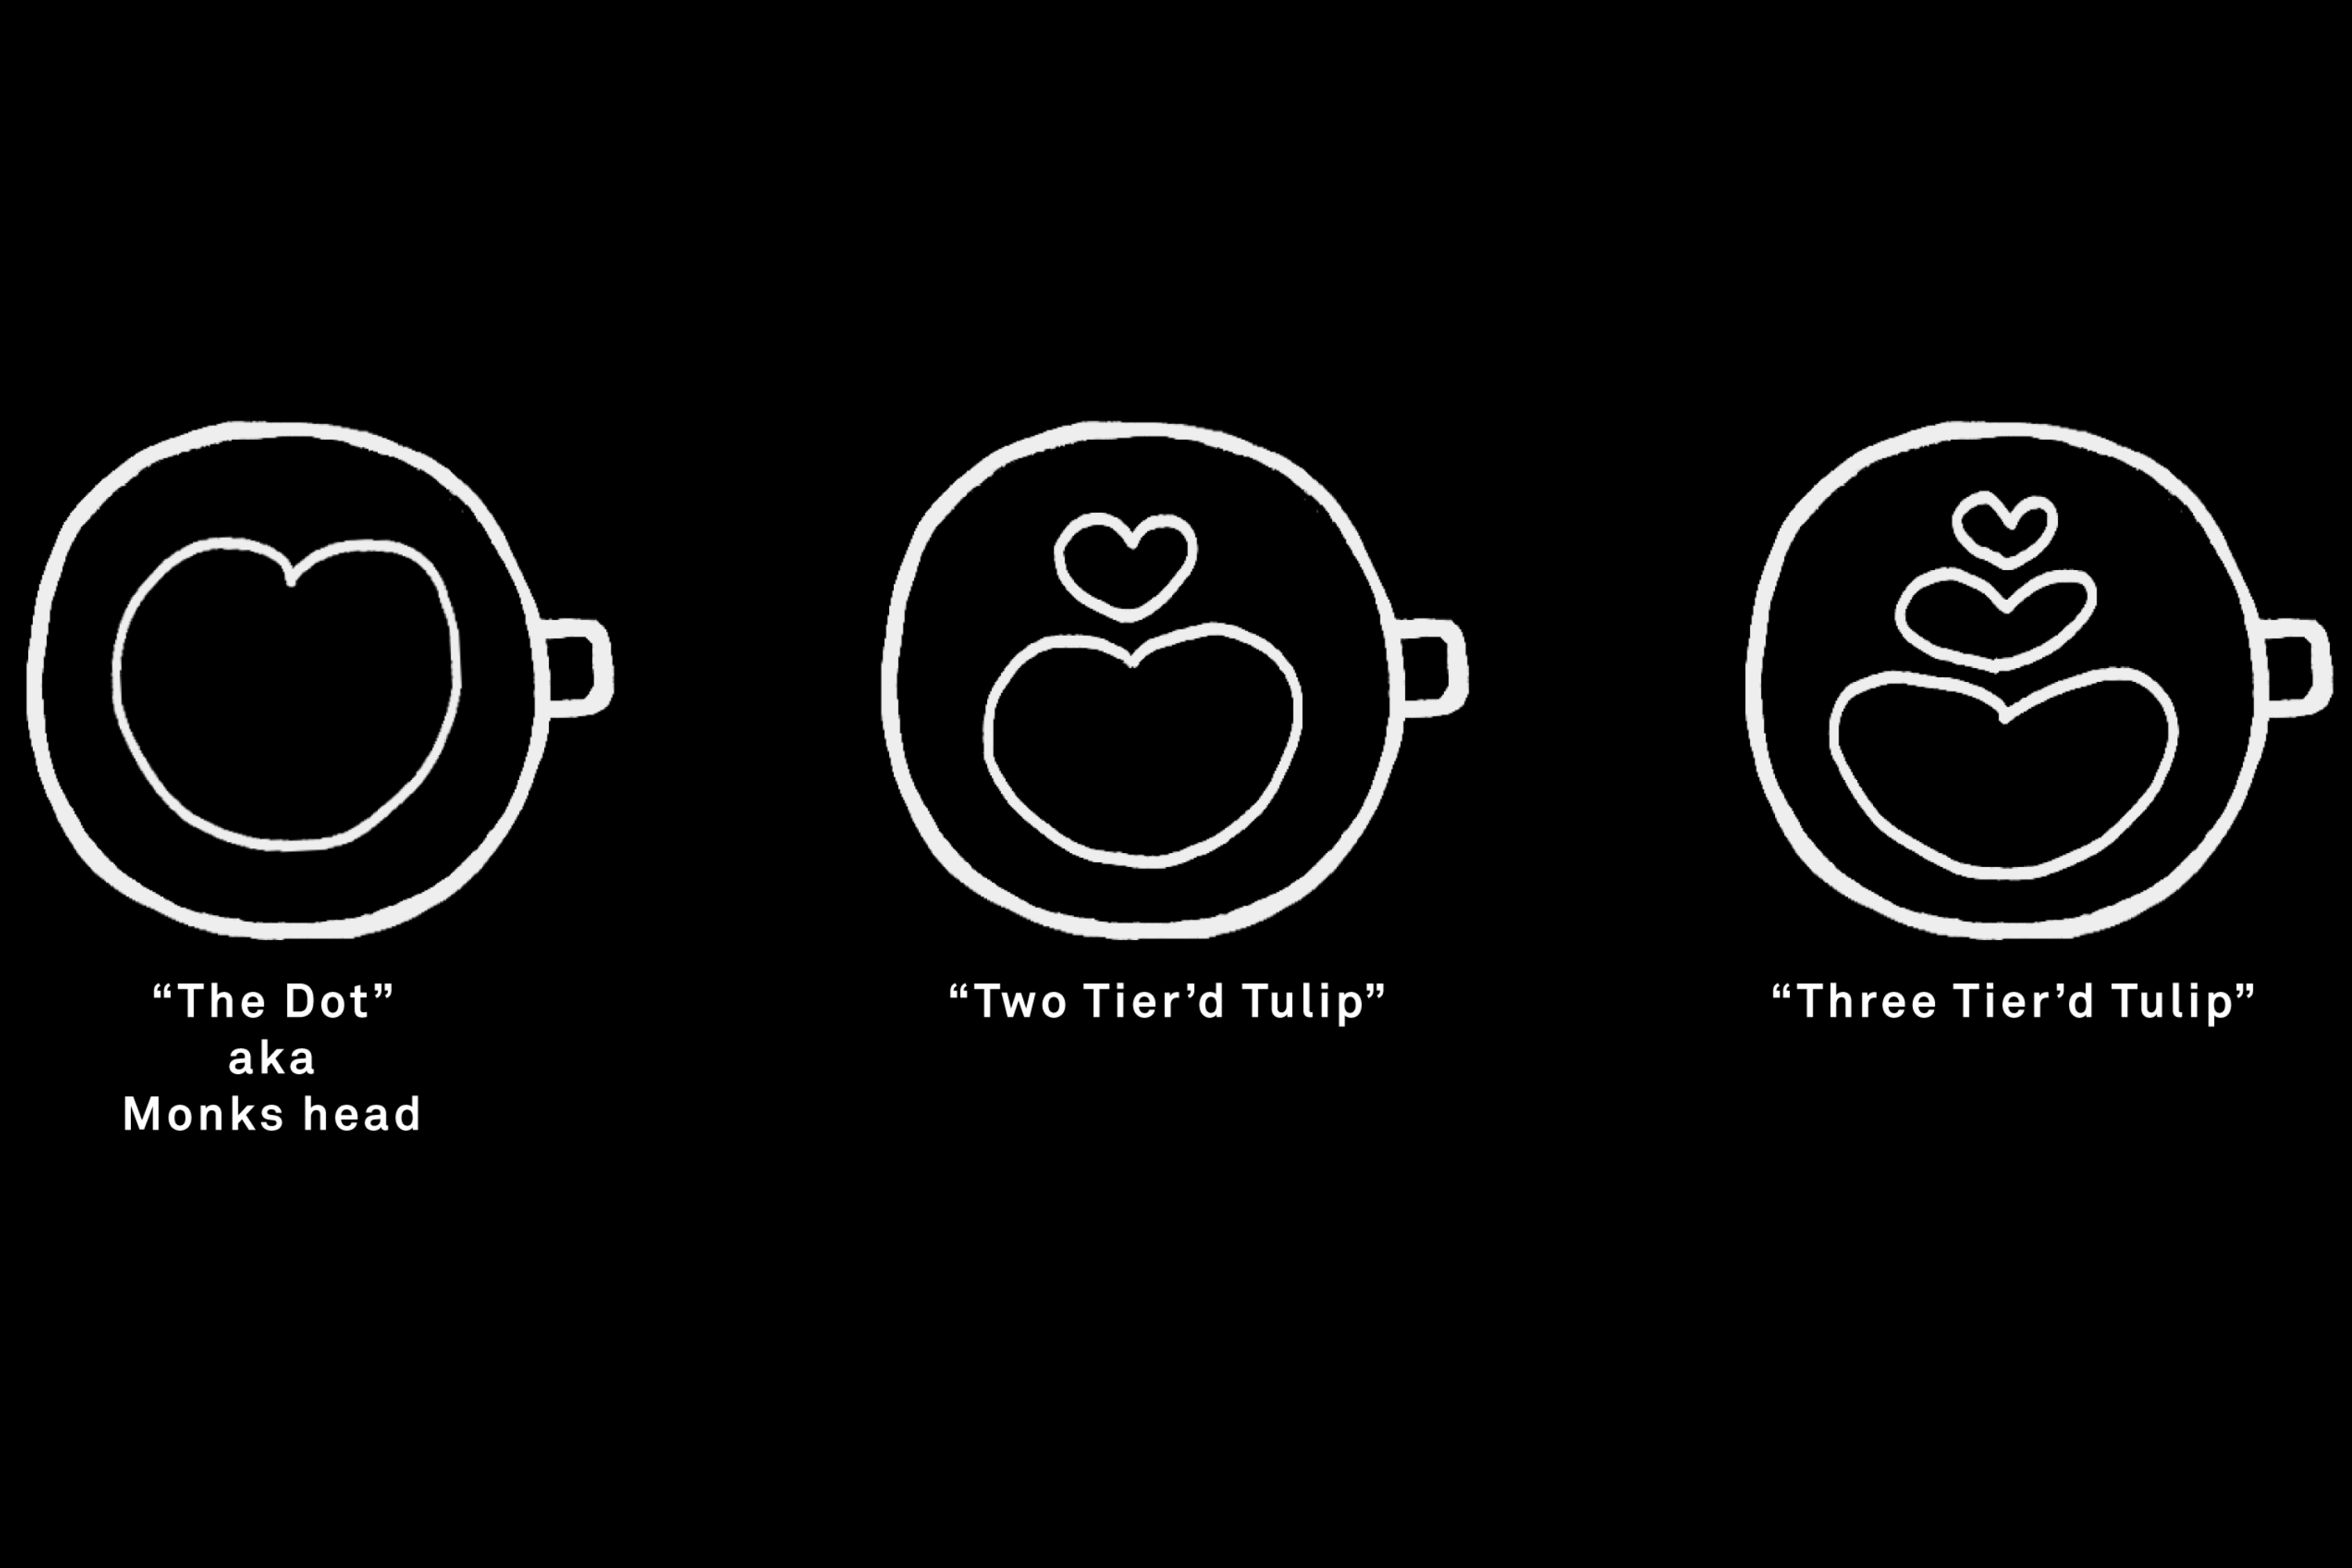
“The Dot” aka Monks Head
Fundamental to most building blocks of latte art patterns
“Two Tier’d Tulip”
The next step up from the Dot
“Three Tier’d Tulip”
A classic and is built from the dot but repeated three times
The following two patterns require a “wiggle” technique where you’re only moving the jug slightly with your wrist to creating a left right flow of the milk.
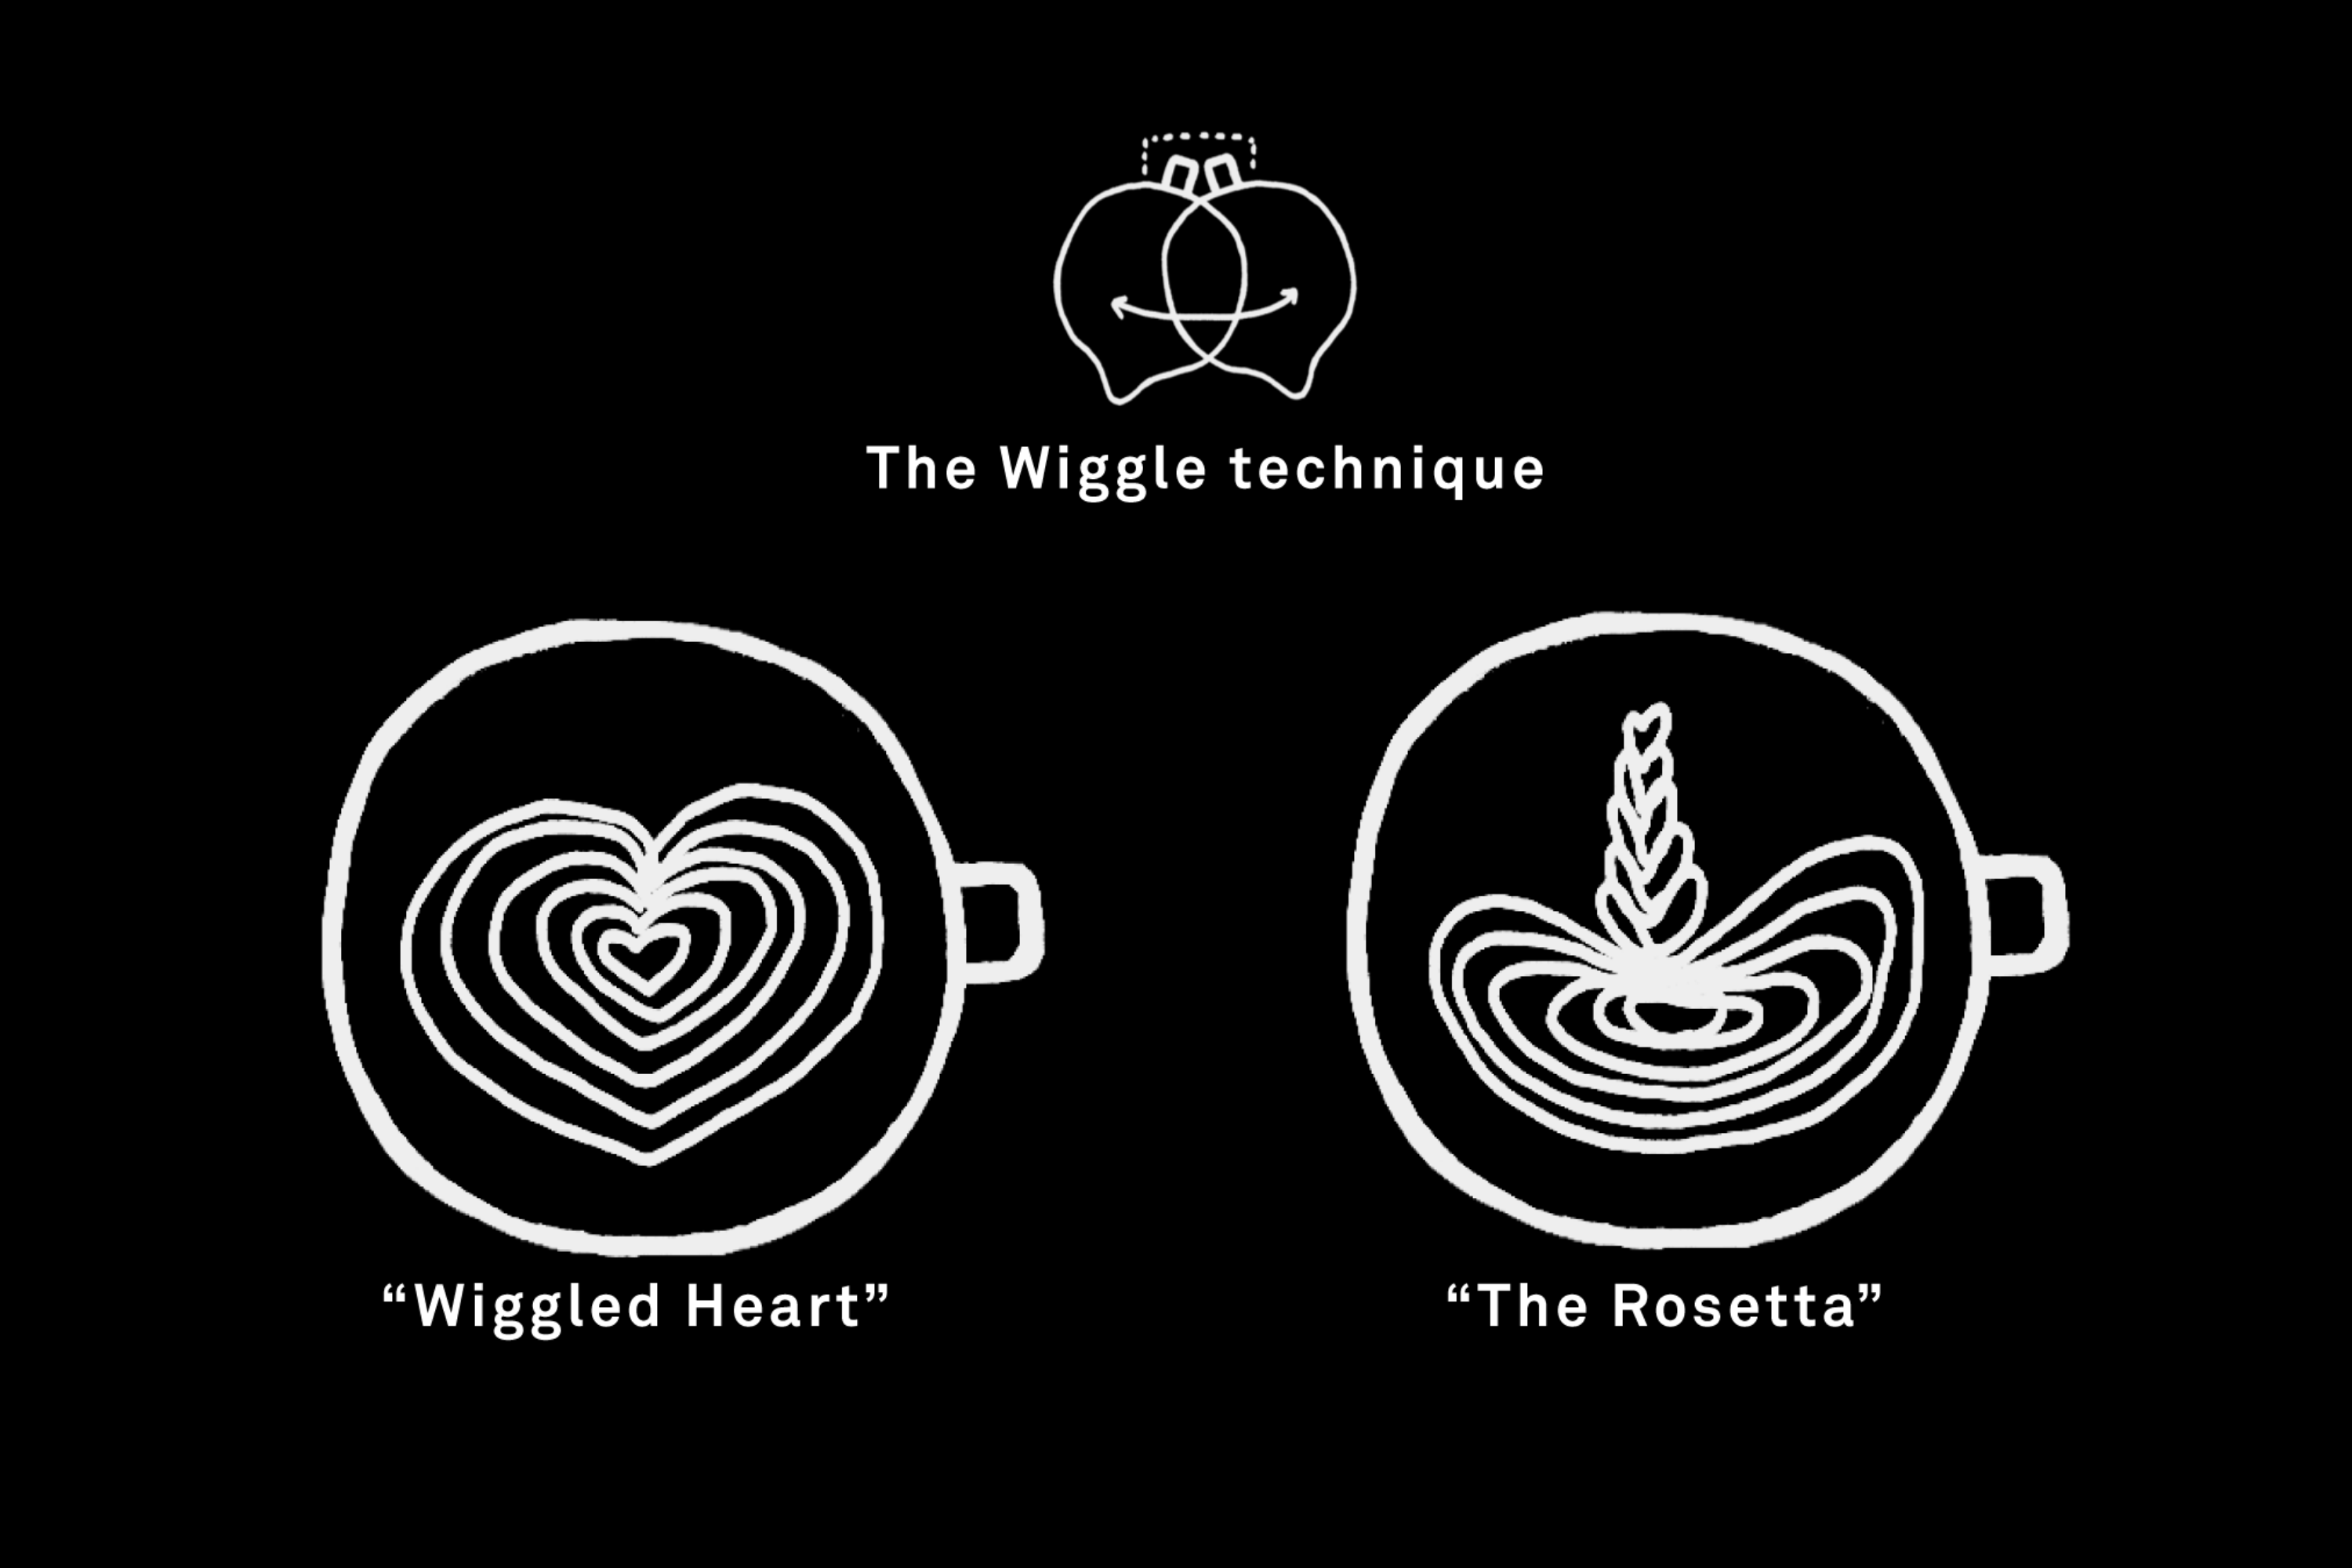
“Wiggled Heart”
A classic and very commonly poured. This is the building block to doing "Rosettas".
“Rosetta”
A classic and the most difficult to achieve, but when done right its very visually effective.